Queue Index Web Solutions

GET All WordPress Themes & Plugins @Just ₹349/-

30 Days Money Back Guarantee *No Question Asked

Server

VPS

Installing Windows on Contabo Servers: A Step-by-Step Guide

We all know that Contabo offers some of the best VPS, VDS, and Dedicated Servers out there. However, they charge around $8 per month for installing Windows on your server, which can be expensive for many users. In this article, we’ll show you how to install Windows on a Contabo server yourself, potentially saving you that extra cost. Alright, let’s get started with the step-by-step process of installing Windows on your Contabo server. Here’s how you can do it easily: Step 1: Reinstalling Your Server with Ubuntu 20.04 To reinstall your server with Ubuntu 20.04, follow these simple steps: 1. Go to Your Server Control Panel Log in to your VPS, VDS, or Dedicated Server control panel. You’ll see your server details, like its IP address, status, and other options. Look for the “Re-Install” button. 2. Start the Reinstallation Click the “Re-Install” button, and you’ll be taken to the OS reinstallation page. Choose “Ubuntu 20.04” as the operating system, generate a new password (don’t forget to save it), and then hit “Start Installation.” 3. Check Installation Progress On the left-hand side of the menu, click “OS Installation.” Here, you can track the progress of your Ubuntu installation. By following these steps, you’ll reinstall your server with Ubuntu 20.04, giving you a fresh and ready-to-use setup.  This will ensure you have the latest version of Ubuntu installed and properly set up on your server. Step 2: Enabling Rescue Mode for Your Server Once you’ve finished installing the OS, head back to your server control page. Here’s what to do next: 1. Find the Rescue System Option Look for a button labeled “Rescue System” in the control panel. Click on it to move to the next step. 2. Select the Operating System On the Rescue Mode page, choose “Debian-10” as the operating system. After that, generate a password for the rescue mode. Make sure to save this password. 3. Start Rescue Mode Once everything is set, click the “Start Rescue System” button. The rescue mode will be enabled within 1 to 5 minutes. That’s it—your server is now in rescue mode, ready for further steps! Step 3: Generate VNC Login Information & Access VNC 1. Go to Your Server Management Page Head back to your server management page and find the “Manage” button. Hover your mouse over it, and a list of options will appear. Look for “VNC Information” and click on it. 2. Get VNC IP and Port After clicking, you’ll see your VNC login details, including an IP address and port number.Example:VNC IP: 173.249.8.80VNC Port: 64292 3. Generate VNC Password In the same list, find the option labeled “VNC Password.” Click on it and generate a password for your VNC login. Just a heads-up—don’t use any special symbols in this password. 4. Download VNC Software To access the server, download a VNC client software like RealVNC or UltraVNC on your PC. Install it, and open the software.   5. Login with VNC Details Once you open the VNC software, you’ll see an option to input your VNC login details. Enter the VNC IP and port number like this:173.249.8.80:64292Then, press enter. The software will prompt you to enter the password you generated earlier. 6. Access Your Server’s Desktop If the details are correct, you’ll be connected to the server and see the desktop interface. That’s it! You now have access to your server through VNC. Step 4: Installing Windows on Your Contabo Server 1. Open Terminal You’ll find the Terminal in the bottom menu of your VNC interface. 2. Run Commands In the terminal, you need to type in the following commands carefully (since copy-pasting directly into the terminal may not work). These commands will prepare your server for the Windows installation. apt updatesudo apt update -ysudo apt upgrade -ysudo suapt install gparted filezilla grub2 wimtools -ygpartedgdisk /dev/sdargpwYmount /dev/sda1 /mntcd ~mkdir windiskmount /dev/sda2 windiskgrub-install –root-directory=/mnt /dev/sdacd /mnt/boot/grubnano grub.cfg 3. Modify GRUB Configuration Now, you’ll need to write some code in the GRUB configuration file. This will allow your server to boot the Windows installer. Write the following code in the file: menuentry “windows installer” {insmod ntfssearch –set=root –file=/bootmgrntldr /bootmgrboot} To save the file, press:Ctrl + XThen press: YThen press: Enter 4. Run Additional Commands Now, you’ll need to run these commands to download and set up the Windows installation files. cd /root/windiskmkdir winfilewget -O win10.iso https://t.ly/swrq1mount -o loop win10.iso winfilersync -avz –progress winfile/* /mntumount winfilewget -O virtio.iso https://shorturl.at/aiy13mount -o loop virtio.iso winfilersync -avz –progress winfile/* /mnt/sources/virtiomkdir /mnt/sources/virtiocd /mnt/sourcestouch cmd.txtecho ‘add virtio /virtio_drivers’ >> cmd.txtwimlib-imagex update boot.wim 2 < cmd.txtreboot 5. Reboot Your Server After running these commands, your server will reboot, and you’ll be able to start the Windows installation process. At this point, you should see the Windows installer ready to go. By following these steps, you’ll successfully install Windows on your Contabo server. After you’ve entered all the commands, your server will restart, and the Windows installation wizard will appear. Just follow the steps to finish installing Windows. Once done, you can access your server through Remote Desktop (RDP) using your PC’s RDP software. Simply log in with the server’s IP address, the username, and the password you set during the Windows installation.

Installing Windows on Contabo Servers: A Step-by-Step Guide Read More »

What is SMTP? A Full Guide to SMTP for Email Marketers缩略图

What is SMTP? A Full Guide to SMTP for Email Marketers

Each day, a whopping 306.5 billion emails are exchanged worldwide, showcasing the widespread use of email for communication. While it’s a common means of connecting, have you ever wondered about the journey your email takes after you hit “send”? How does it travel from your device to reach its intended recipient? If you guessed SMTP, you’re right. The Simple Mail Transfer Protocol is the magic behind your email exchanges. Get set for an interesting journey as your messages make their way from your outbox to the recipient’s inbox. The SMTP server takes charge of the entire email process, managing communication, queuing, authentication, and delivery. A key protocol called the Simple Mail Transfer Protocol (SMTP) is necessary for sending emails across the internet. SMTP is a networking protocol that facilitates communication between users and servers, regardless of their hardware or software. Just as SMTP enables universal mailbox addressing, outlining the route an email takes from sender to receiver ensures global email delivery. SMTP facilitates the transmission of emails. Users employ the Simple Mail Transport Protocol (SMTP) to authenticate and guide the transfer of outgoing emails. Serving as a shared language among mail servers and other MTAs, SMTP plays a crucial role in ensuring the successful delivery of your messages. This article aims to address the following inquiries: Introduction to SMTP or Simple Mail Transfer Protocol? SMTP, or Simple Mail Transfer Protocol, serves as the widely accepted standard for sending and receiving emails. The common method for connecting email clients, such as Outlook, with servers for the exchange of electronic mail is known as SMTP, with examples like Microsoft Exchange. Additionally, the two widely adopted protocols for email clients to connect to their servers and retrieve messages are POP3 (Post Office Protocol) and IMAP (Internet Message Access Protocol). Several server applications, including SMTP, POP, and IMAP, might utilize the same hardware. Similar to the other technologies and services mentioned earlier, SMTP operates at the Application layer, relying on the lower layers of the TCP/IP stack for data transmission. In the business realm, SMTP is frequently used for email delivery. Enterprise applications might employ a local SMTP server or a distant SMTP server to handle the reception and forwarding of messages. It’s crucial to verify that SMTP servers can receive messages regardless of their physical location and are easily accessible. What Is A Protocol? Interaction among two or more devices becomes feasible only when they adhere to a set of established rules and processes referred to as a protocol. The exchange of information between computers and other electronic devices is governed by a set of guidelines known as “protocols.” These protocols dictate the permissible types of data and communication. The International Organization for Standardization is presently engaged in a project named Open Systems Interconnection (OSI). Within this initiative, one of the Internet protocols establishes the norm for data exchange between networks. This framework simplifies the complex process of data transfer into seven separate levels. What does an SMTP server do? Similar to any other server, an SMTP server operates within a network and offers a specific service to other programs. The SMTP server manages all facets of email transmission, including sending, receiving, and relaying. Functioning like tangible mailboxes, servers store and forward messages. Drawing a parallel to mailing a letter from one location to another, the process involves sending it to a local post office for processing, which then forwards it to the destination’s post office for final delivery. Emails necessitate transmission through the SMTP protocol, and an SMTP server must consistently communicate in this language. Contemporary SMTP servers need to take into account authentication methods like DKIM (Domain Keys Identified Mail) and SPF (Sender Policy Framework). Validating outgoing emails stands out as one of the most effective approaches to assure recipient servers of their trustworthiness. SMTP servers, responsible for sending emails, must aptly handle response codes from the servers receiving the emails. If you’ve ever encountered limitations on the number of messages sent or received concurrently with Yahoo! Mail and AOL, it’s because the servers, in that instance, return an error code indicating a temporary downtime. Types of SMTP servers – Normal Servers Essentially, it’s a regular SMTP server that sends emails to the right person once it’s confirmed they got it. We need to check how many nearby domains this server is handling. When you select the “pass it on” option for an email from a different domain, it goes to the intended server. SMTP servers can handle both incoming and outgoing deliveries, or to be specific, both messages coming in and going out. Learn more about email marketing and the SMTP server by clicking here. – SMTP Proxy Servers By using SMTP proxy servers, you can apply certain filters to incoming emails formatted with the Simple Mail Transport Protocol (SMTP). You can set it up to either permit or decline emails based on the source addresses, the actual server name of the originating host, or the claimed server name of the person who sent the message. Additionally, you can configure it to allow or disallow email relaying based on the remote host or server to which an email is sent. This can be achieved through specific configurations. What are the Different Types of SMTP? SMTP has two main types, which are:  -End-to-end SMTP The prevalent form of SMTP is end-to-end SMTP, where the sender’s Mail User Agent (MUA) connects directly to the recipient’s Mail Transfer Agent (MTA) for email transmission. Subsequently, the email is directly delivered to the recipient’s Mail Delivery Agent (MDA). This SMTP model enables a straightforward and effective transfer of emails between the sender and recipient. -Store-and-forward SMTP Store-and-forward SMTP varies from End-to-end SMTP as it comes into play when the sender and recipient lack a direct connection. Here, the sender’s Mail User Agent (MUA) links up with a Mail Submission Agent (MSA), which preserves the email before transmitting it to the recipient’s Mail Transfer Agent (MTA). Subsequently, the email makes its way to the recipient’s

What is SMTP? A Full Guide to SMTP for Email Marketers Read More »

WHAT IS THE DIFFERENCE BETWEEN RDP AND VPS缩略图

WHAT IS THE DIFFERENCE BETWEEN RDP AND VPS

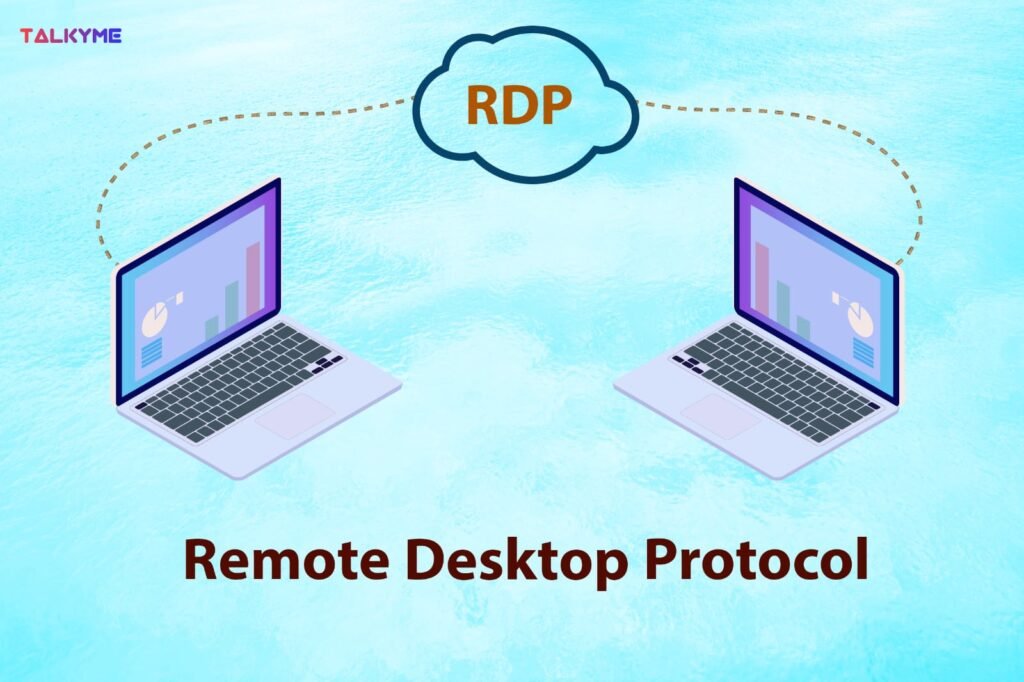
When talking about remote servers, you might hear about “RDP” and “VPS.” These terms relate to remote computing, but knowing the differences can help you choose the right option for you. In this blog, we’ll dive into the details of RDP (Remote Desktop Protocol) and VPS (Virtual Private Server), explaining their unique features and how they’re used. Remote Desktop Protocol (RDP) RDP, or Remote Desktop Protocol, is a Microsoft-developed communication method that lets users remotely access and manage a computer. With RDP, you can connect to a distant desktop or server through a network connection, gaining complete access to desktop and applications as if you were physically at the machine. It’s widely used in business settings, enabling remote work for employees and efficient server management for IT professionals. How RDP Works RDP works by sending pictures and sounds from the faraway server to the user’s device. It grabs visuals, audio, and input signals from the connected device and sends them back and forth between the local and remote machines. This two-way exchange guarantees a smooth user experience, with very little lag or delay. RDP is structured on the client-server setup, where the server holds the resources, and the client device gets access to and interacts with them. Key Features of RDP Total Desktop Control: RDP provides users with total control over remote desktops, letting them manage and navigate the distant system as if it were their own.Versatility: RDP works smoothly with different operating systems, making it flexible and usable on various devices such as computers, tablets, and smartphones.Strong Security: RDP uses powerful encryption methods to safeguard the privacy and integrity of data transmitted between the client and server.Efficient Resource Usage: RDP employs compression techniques to streamline bandwidth usage, ensuring effective remote use even on slower network connections. Virtual Private Server (VPS) While RDP is about reaching a distant computer, a Virtual Private Server (VPS) does things differently. A VPS is like a virtual server living on a physical one, reserved just for a person or a group. It gives its users a set of resources – like CPU, RAM, and storage – within a bigger server system. How VPS Works In a VPS arrangement, a single real server gets split into several virtual sections using hypervisor technology. Each section, called a virtual machine, works on its own and offers a private space for the user. Users get root access to their virtual machine, allowing them to manage its operating system, install software, and make configurations. Key Features of VPS Separation: VPS provides a shield from other virtual machines sharing the server, safeguarding your resources and performance from being influenced by others’ actions. Flexibility: VPS makes it simple to scale up, letting users assign more resources like CPU, RAM, and storage as their demands increase. Personalization: Having root access grants users the liberty to personalize their VPS setting based on their particular needs, installing software and operating chosen applications. Dependability: VPS hosting commonly includes assurances for uninterrupted service, assuring that your server stays accessible and operational without disruptions. Choosing Between RDP and VPS Although RDP and VPS both cater to remote computing needs, the choice between them hinges on the particular use case and requirements. When to Choose RDP Desktop Access: If you want complete access to a particular computer for tasks or running applications from a distance, RDP is the best option. Centralized Management: Businesses needing centralized control over many desktops or servers can efficiently use RDP for effective management and monitoring. Desktop Access: If you want complete access to a particular computer for tasks or running applications from a distance, RDP is the best option. Centralized Management: Businesses needing centralized control over many desktops or servers can efficiently use RDP for effective management and monitoring. Existing Infrastructure: If you already have a physical server or a hosted cloud setup, using RDP can be a cost-effective solution. When to Choose VPS Hosting Servers: When you’re hosting websites, applications, or databases that need dedicated resources and a high level of control, a VPS provides a dependable and adaptable solution. Easy Growth: If you expect growth or changing resource needs, VPS allows you to easily expand without disrupting your services. Full Isolation: If safeguarding data and ensuring top performance are crucial, having your own virtual machine on a VPS ensures that your resources are not shared with others. Conclusion In short, RDP and VPS are different ways to do remote computing, each with specific uses. RDP is about accessing a specific machine remotely, controlling the desktop, while VPS offers a virtualized server with dedicated resources. Understanding these differences helps you choose between RDP and VPS based on your needs. Factors like desktop access, centralized management, hosting needs, scalability, and desired control influence your decision.

WHAT IS THE DIFFERENCE BETWEEN RDP AND VPS Read More »

Demystifying RDP Server Setup: A Comprehensive Guide by Queue Index Solutions缩略图

Demystifying RDP Server Setup: A Comprehensive Guide by Queue Index Solutions

Introduction: Section 1: What is RDP and Why Is It Important?: Section 2: Understanding RDP Server Setup: Section 3: Benefits of an RDP Server: Section 4: Queue Index Solutions’ Expertise in RDP Server Setup: Section 5: Best Practices for RDP Server Security: Section 6: Case Studies: Section 7: Conclusion:

Demystifying RDP Server Setup: A Comprehensive Guide by Queue Index Solutions Read More »

Setting Up an IVR (Interactive Voice Response) Server: A Comprehensive Guide缩略图

Setting Up an IVR (Interactive Voice Response) Server: A Comprehensive Guide

Interactive Voice Response (IVR) systems are powerful tools that enhance customer service and streamline communication within businesses. This step-by-step guide will help you set up an IVR server to create an efficient and professional call-handling system. Step 1: Define Your IVR Objectives Before diving into the technical aspects, clearly define the objectives of your IVR system. Consider how you want it to improve customer service, automate tasks, or provide information. Knowing your goals will guide the design and setup process. Step 2: Choose the Right Hardware or Software IVR systems can be set up using hardware-based solutions, software applications, or cloud-based services. Depending on your budget and specific requirements, select the option that best suits your needs. Step 3: Plan Your Call Flow Design a call flow that outlines how incoming calls will be handled. Determine menu options, routing logic, and the types of interactions you want to offer callers. Consider creating a flowchart to visualize the call flow. Step 4: Record and Upload Voice Prompts Record clear and professional voice prompts for your IVR system. These prompts should provide instructions and information to callers. Make sure the audio quality is excellent. Step 5: Set Up Routing Logic Configure your IVR system to route calls based on the caller’s selections or input. Use conditional routing to direct callers to the appropriate department, person, or information. Step 6: Integrate with Your Phone System If you’re using a hardware-based IVR system, integrate it with your existing phone system. For software or cloud-based solutions, set up the necessary APIs or connections to ensure seamless communication. Step 7: Test Your IVR System Before deploying your IVR system, thoroughly test it. Verify that voice prompts are clear, routing logic is accurate, and all interactive features function as intended. Step 8: Monitor and Analyze Implement a system for monitoring and analyzing call data. This data will help you make improvements to your IVR system, optimize call flows, and enhance the caller experience. Step 9: Train Your Team If your IVR system requires human intervention, train your team to handle calls effectively and assist callers when necessary. Step 10: Continuous Improvement IVR systems should not be static. Regularly review call data, gather feedback, and make adjustments to improve the system’s performance and customer satisfaction. Step 11: Compliance and Data Security Ensure your IVR system complies with relevant regulations and standards, particularly if it handles sensitive customer information. Implement security measures to protect caller data. Step 12: Customer Feedback Encourage customer feedback to understand their experience with your IVR system. Use their input to make refinements and enhancements.

Setting Up an IVR (Interactive Voice Response) Server: A Comprehensive Guide Read More »

Unlocking the Power of SMTP/Domain/IP Warmup for Email Marketing Success

Are you a new business venturing into the world of email marketing? Congratulations on taking this significant step to connect with your audience! However, before you hit “send” on your first email campaign, there’s a crucial process you should know about – SMTP/Domain/IP warmup. In this blog post, we’ll explore what SMTP/Domain/IP warmup is and why it’s essential for your email marketing success. What is SMTP/Domain/IP Warmup? SMTP/Domain/IP warmup is a strategic and gradual process of establishing the reputation of your email sending infrastructure. It involves sending a progressively increasing volume of emails over a period, typically starting with a small number and gradually ramping up. This process helps build trust with Internet Service Providers (ISPs) and email service providers, ensuring your emails land in the inbox rather than the dreaded spam folder. Advantages of SMTP/Domain/IP Warmup Improved Deliverability: SMTP/Domain/IP warmup establishes your email reputation, making ISPs more likely to accept your emails and deliver them to the recipient’s inbox. This leads to higher email deliverability rates. Enhanced Open Rates: With a positive sender reputation, your emails are more likely to be opened and read. High open rates are crucial for the success of your email marketing campaigns. Avoiding Spam Traps: ISPs often use dormant email addresses as spam traps. Sending to these addresses can harm your reputation. Warmup ensures you avoid these traps by gradually increasing your sending volume. Reduced Bounce Rates: During warmup, you can identify and address any email bounce issues promptly. This helps maintain a clean and updated email list, further boosting your sender reputation. Optimal Engagement: As you gradually increase your sending volume, you have the opportunity to monitor and adjust your email content and targeting strategies for maximum engagement. This fine-tuning is critical for long-term success. How to Execute SMTP/Domain/IP Warmup Segment Your Email List: Start by segmenting your email list into smaller, manageable groups. This allows you to control the volume of emails sent to each segment during warmup. Gradual Volume Increase: Begin by sending a small volume of emails from your new SMTP server or IP address. Monitor delivery rates and adjust as needed. Monitoring and Feedback Loops: Keep a close eye on your email campaign performance. Pay attention to bounce rates, spam complaints, and open rates. Use feedback loops to identify and resolve issues promptly. Content Quality: Ensure that your email content is relevant and engaging. Avoid spammy practices, such as excessive use of keywords and misleading subject lines. Consistency: Maintain a consistent sending schedule and gradually increase your sending volume over a few weeks or months, depending on your email list size. In conclusion, SMTP/Domain/IP warmup is a critical process for new businesses embarking on their email marketing journey. It lays the foundation for a positive sender reputation, which is essential for high deliverability and engagement rates. By following the warmup process diligently, you’ll set your email marketing campaigns on the path to success and build strong connections with your audience. At Queue Index, we understand the importance of a successful warmup process for your email marketing efforts. Our Warmup Plan can help you navigate this crucial step with ease. Contact us today to learn more about how we can support your email marketing journey and help your business thrive.

Unlocking the Power of SMTP/Domain/IP Warmup for Email Marketing Success Read More »

BEST AND CHEAP VPS HOSTING FOR EMAIL MARKETING缩略图

BEST AND CHEAP VPS HOSTING FOR EMAIL MARKETING

A few days ago, one students I teach asked me for a an overview of the most cost-effective and affordable VPS hosting service providers to send out marketing emails. This is a most difficult questions to answer. It’s because there are a lot of VPS hosting providers, but they are not all perfect. Read 10 ways to create the perfect SMTP server for marketing via email 1. Contabo It is the German VPS provider is selling VPS for a reasonable price. Beginning with EUR4.99 per month, they’re the top of the line in the market for SMTP server. They also sell VPS that have open port 25, which is 25. This means you don’t need to fret about port, at minimum. You can also purchase an additional IPv4 to satisfy your needs for emailing. Check out Contabo VPS plans 2. OVH The France hosting provider based in France is the second one in my list. They also offer VPS for a low cost, but they are not as affordable as Contabo. However, they’re a good choice and have several datacenters around the globe. You can also order an additional IPv4. Check out OVH plans 3. Hetzner Another cheap VPS provider that is located in Germany as well as Finland. They also sell VPS that have open port 25 at present. You can also get more than 10 extra IPs. Check out Hetzner cloud plans 4. Hostwinds Hostwinds prices aren’t very affordable, but they are well-known for their high-quality service. There are some that offer competitive prices as well as open ports 25. Nowadays, several VPS providers do not offer VPS that have an open port to reduce spamming. Check out Hostwinds plan 5. Interserver Interserver does not just provide VPS hosting, but they also let you select a different platform which you can sign up depending on the requirements of your needs. In addition, from KVM and open VZ They offer a variety of options for you at an affordable prices. Check out Interserver VPS plans This list would be inexhaustible and I have tried to list few cheap and best one. Let me know in comment if you find another best one.

BEST AND CHEAP VPS HOSTING FOR EMAIL MARKETING Read More »

What exactly is an IP warm-up and why is it necessary?缩略图

What exactly is an IP warm-up and why is it necessary?

Deliverability of emails can be affected by a variety of factors, including the reputation of your domain, the content of your email and even the kind of email you send. A IP address can be just one of these factors. If you’re using a brand new IP is a negative factor that can affect the effectiveness of your email marketing campaigns. The Solution? A process known as IP warmup. The article below will assist be aware of what is an IP warming up is, and the reason you should use it. It will also show you the most effective IP warmup methods that you must be aware of while getting your IPs warmed up. What is IP warm up? IP warming (or IP warming) is an email sending process that is carried out using a brand new (or cold) IP address and gradually increasing the number of emails sent per an established schedule to build a good reputation for the IP address. The IP address refers to a distinct number that can be used to identify you as an email user. The ISPs (Internet Service Providers) make use of the IP address of your computer to monitor and assess your email activity and, ultimately they determine the reputation of your IP. If the IP address you are using is brand new, it is necessary to get it warm in order to ensure an excellent email delivery rate for your email marketing campaigns. Why is IP warm up important? The aim to IP warming is to boost your IP credibility and increase ISPs confidenceso all emails you send can be delivered straight to the inboxes of recipients (and not restricted by filtering for spam). If you begin sending emails using a new IP address, with no reputation ISPs and even the ESPs (Email Service Providers) are likely to be suspicious of it and block your IP from sending an increased number of emails at the same time till they “prove” that you are a trustworthy sender. Once ISPs have historical information regarding your IP address as well as your email activities, they will allow you to send emails to a greater number of individuals and vice versa and reduce your email volume in the event that you develop an unpopular IP profile. IP warming helps in establishing an image of trust for your brand-new IP by gradually sending greater and greater amount of emails over a time of several weeks , until it’s prepared and “warmed up” for real email marketing campaigns. NOTE: It is important to know that the IP reputation isn’t the only thing that could affect your email delivery. ISPs also consider factors like the popularity of the email domain or subdomains or even a particular email address in determining whether or how many messages need to be sent to your subscribers. What impacts IP reputation? It’s crucial, however to recognize that none of these components have the same weight. For instance, the IP image won’t get significantly affected by people who unsubscribe to your email list. However, however having a lot of spam complaints can seriously harm credibility of the IP. IP warm up schedule The process of warming up the IP address is a continuous procedure that requires set schedules – beginning with a handful of emails each day and gradually increasing the volume over the course which is of thirty (or or) days. For instance, if you plan to send 1,000,000 emails each month to support your email marketing campaigns It is recommended to start with a couple of dozen of warm-up emails every day. Then, gradually increase the number emails you send until you reach the desired number of emails: Alongside your initial IP warmup You must also keep sending out this massive amount of emails each month as your reputation may change frequently. IP warming best practices Warming up your IP is a series of different activities that slow (but definitely) increase your reputation for your IP as time passes. Here are some tips to be aware of while getting your IPs warm

What exactly is an IP warm-up and why is it necessary? Read More »

How To Choose The Right SMTP Provider For Your Business Needs缩略图

How To Choose The Right SMTP Provider For Your Business Needs

SMTP is the most beneficial thing that could happen to every business. The SMTP server is the top choice for email marketing tools that are suited to your needs. It doesn’t matter if it’s a service product or one that is based on a product and email marketing is the way to go, it’s SMTP server has your back. But, you need to know which kind of SMTP server will be best for you and how to implement that.Before you do that, be aware of the kinds of SMTP servers are available as well as their capabilities. In this article, you’ll learn about the most effective SMTP servers that you could make use of for your business The Features Of The Best SMTP Provider FSMTP can come in a variety of varieties. However, what makes this server distinct is the speed at which it delivers your messages and emails. This is why companies should make use of a professional outgoing server with a higher delivery rate. But, a good SMTP server should have Flexible Plans The requirement to send emails differs according to the business. For somebusinesses, the need for email is more extensive than the norm. Others may be content with periodic emails. Also allow your service provider for SMTP provide you with the various plans before you pick the most suitable one. Constant Relationship With Top ISPs Establishing a strong relationship with the most reputable ISPs is essential to ensure the highest speed of delivery for the newsletter for the business. Compatibility With Email Clients And Software The configuration should be in sync with email clients as well as the software. 24X7 Hours Support The server SMTP must be accessible all day long to assist you with any problems encountered by the user. Accurate Statistics The SMTP server is required to provide precise statistics, which give the client total control over their mailings. It can assist companies that are clients in enhancing their campaigns’ effectiveness. Now that you are aware of the benefits of the most reliable SMTP supplier, you must determine which one is best suited to your company’s needs. What Is The Best: Simple SMTP Or Professional SMTP Have you ever thought about which one would be the best choice for your business – simple SMTP or a professional one? You must be aware of the fundamental features and distinctions between the two. Normal SMTP The standard or end-to-end SMTP method is used to establish connections between two companies in which your SMTP begins the communications and the server on the other hand is waiting for the request be acknowledged. It is among the most basic types that uses SMTP for sending emails. Professional SMTP As opposed to regular SMTP, professional SMTP is more complicated. The communication here is not limited to two organizations, but also many more. It is helpful to send emails between companies. The client SMTP transmits emails to the server that received it. The recipient server then receives the mail , and the sender SMTP keeps a copy of the email. Thus, SMTP works well checking the security of the company’s email server. So, now that know the ins and outs of kinds and how SMTP servers function to your satisfaction, you are able to select the one that is best suited to your requirements.

How To Choose The Right SMTP Provider For Your Business Needs Read More »

Currency