Queue Index Web Solutions

GET All WordPress Themes & Plugins @Just $3.99/-

30 Days Money Back Guarantee *No Question Asked

+91-8929472337

info@queueindex.com

Author name: Rabeena Khatoon

Error 503

How to Fix Error 503 : Easy Steps to Get Your Service Back Online

Imagine you’re searching for something online. You find what you need on the first page of the search results and click the link. But instead of seeing the webpage you expected, you’re faced with a 503: Service Unavailable error message. You’re probably going to click back right away and check out the next result, right? Usually, when visitors see a 503 error, they quickly return to the search results and look elsewhere. These errors can confuse and frustrate users, potentially affecting your website’s traffic in the long run. To make things even more complex, various issues can cause 503 errors on your website. There’s no simple, one-size-fits-all solution to fix 503 errors on your site. These errors can occur due to plugin conflicts, unexpected maintenance, or server overloads. You’ll need to do some investigation to pinpoint the cause. In this post, we’ll dive deep into 503 errors to understand their impact on your website and traffic. We’ll explore their causes and provide solutions to fix these issues on your site. What is an HTTP 503 error? In simple terms, an HTTP 503 error means your website is unavailable because the server isn’t reachable. This can happen if the site is too busy, under maintenance, or dealing with a DDoS attack or other issues that need to be checked out. The Internet Engineering Task Force explains the 503 Service Unavailable error like this: The 503 (Service Unavailable) status code means the server can’t handle the request right now because it’s either overloaded or undergoing maintenance. This problem should be resolved after a short delay. The server might also include a Retry-After header to tell the client how long to wait before trying again. The most frustrating thing about a 503 error code is that it doesn’t give you much information. While it indicates there’s an issue with server availability, it doesn’t explain why. Usually, you’ll just see a “Service temporarily unavailable” message. Error Code: 503 – Service Unavailable A 503 error occurs when a server is temporarily unable to handle a request. This can happen due to server overload, maintenance, or temporary issues. The error provides minimal information, usually just stating “Service temporarily unavailable.” Common Causes: High Traffic: Overwhelms the server. Scheduled Maintenance: Planned downtime. DDoS Attacks: Disrupt normal traffic. Resource Limits: Exceeding server capacity. Solutions: Check Server Logs: Identify the issue. Scale Resources: Handle more traffic. Contact Hosting Provider: Get support. Wait and Retry: It might resolve on its own. How to Fix a 503 Service Unavailable Error Since the cause of a 503 error isn’t always clear, we’ll need to follow a methodical approach to identify the problem. Here are eight steps to help fix a 503 error on your website. Be sure to refresh your web page before and after trying these steps. Check for Server Overload: Description: High traffic or resource-intensive tasks can overload servers, leading to a 503 error. Solution: Monitor server load using performance metrics or server logs. Consider scaling resources like CPU, memory, or bandwidth if consistently overloaded. Verify Maintenance Status: Description: Scheduled maintenance or updates can temporarily take servers offline. Solution: Check server maintenance schedules. If possible, schedule updates during low-traffic periods to minimize user impact. Review Application or Website Code: Description: Faulty code, updates, or configuration changes can trigger server errors. Solution: Review recent code changes or updates. Ensure compatibility and rollback problematic changes if necessary. Examine Database Connectivity: Description: Database issues, such as connection limits or queries, can cause server errors. Solution: Verify database connection settings. Optimize queries, clear caches, or increase connection limits if needed. Inspect Server Logs for Errors: Description: Server logs provide insights into the exact cause of the error. Solution: Analyze error logs for specific error messages or warnings. Address underlying issues based on log findings. Check for DDoS Attacks or Security Issues: Description: Malicious traffic or security breaches can overwhelm servers. Solution: Implement DDoS protection measures. Review security configurations, update firewall rules, or deploy security patches. Restart Server or Services: Description: A server restart can clear temporary glitches or resolve resource allocation issues. Solution: If feasible, restart server services. Ensure to follow proper procedures to avoid data loss or service disruptions. Contact Hosting Provider Support: Description: Persistent or complex issues may require assistance from hosting provider experts. Solution: Reach out to hosting support for diagnostics and resolution steps. Provide detailed information and error context for efficient troubleshooting. By following these steps, you can systematically diagnose and resolve a 503 Service Unavailable error, ensuring optimal performance and availability of your website or application. Regular maintenance and proactive monitoring can also help prevent future occurrences of this error. Conclusion Encountering a 503 Service Unavailable error can disrupt website access due to server overload, maintenance, code issues, or security concerns. Effective troubleshooting involves monitoring server load, reviewing recent changes, and implementing security measures. By maintaining proactive server management and seeking support when needed, you can minimize downtime and ensure reliable website performance.

How to Fix Error 503 : Easy Steps to Get Your Service Back Online Read More »

WordPress Themes and Plugins缩略图

WordPress Themes and Plugins

WordPress WordPress is a leading content management system (CMS) that powers over 40% of websites globally. Its popularity stems from its user-friendly interface, extensive plugin ecosystem, and customizable themes, allowing users to create unique and dynamic websites without needing advanced technical skills. Whether you’re building a personal blog, an e-commerce store, or a corporate website, WordPress offers a versatile platform to bring your online vision to life. What are WordPress Themes and Plugins WordPress themes are pre-designed templates that determine the overall look and layout of a WordPress website. They include various design elements such as colors, fonts, page structures, and styling options that define the visual appearance of your site. Themes serve as the foundation for your website’s design and layout, allowing you to quickly and easily create a professional-looking site without the need for coding or design expertise. When you install a WordPress theme, it essentially changes the “skin” of your website, giving it a distinct appearance and feel. You can customize and personalize themes to match your brand identity and meet your specific requirements using built-in customization options or additional plugins. WordPress plugins are software modules that add specific features or functionality to a WordPress website. They can range from simple tools, such as contact forms and social media widgets, to complex solutions, like e-commerce platforms and membership systems. Plugins enable users to customize and enhance their websites with additional features beyond the core WordPress functionality. What is Custom WordPress Theme Development? Custom WordPress theme development refers to the process of creating a unique and tailor-made theme specifically for a WordPress website. Unlike pre-made themes, which are readily available for download and use, custom themes are designed and developed from scratch to meet the specific requirements, branding guidelines, and design preferences of a client or website owner. In custom WordPress theme development, every aspect of the theme, including layout, design elements, typography, and functionality, is crafted to align with the client’s vision and goals. This often involves working closely with designers and developers to translate concepts and ideas into a fully functional and visually appealing WordPress theme. Pros and Cons of WordPress Custom Theme Development PROS: 1 Unique Design: Custom WordPress themes offer a one-of-a-kind design tailored to your brand identity, ensuring your website stands out from competitors.Custom Functionality: You can build specific features and functionality into your custom theme to meet the unique needs of your business or audience.2 Scalability: Custom themes are scalable, allowing you to expand your website’s capabilities as your business grows without being limited by pre-built templates.3 Optimized Performance: Custom themes are optimized for performance, ensuring fast loading times and a smooth user experience, which can positively impact SEO and user engagement.4 Brand Consistency: A custom theme allows you to maintain consistent branding across all aspects of your website, reinforcing brand identity and credibility.Enhanced Security: Custom themes are less vulnerable to security threats because they don’t rely on widely-used templates that may be targeted by hackers.5 Full Control: With a custom theme, you have full control over every aspect of your website’s design and functionality, allowing for greater flexibility and customization. CONS: 1 Higher Cost: Custom WordPress theme development can be more expensive than using pre-built themes, as it requires hiring skilled designers and developers to create a unique solution from scratch.2 Time-Consuming: Developing a custom theme takes time, as it involves thorough planning, design, development, and testing processes, which may delay the launch of your website.3 Maintenance Requirements: Custom themes require ongoing maintenance and updates to ensure compatibility with the latest WordPress version and plugins, which may require additional time and resources.4 Technical Expertise Required: Creating a custom theme requires technical expertise in web design, HTML/CSS, PHP, and JavaScript, making it less accessible to those without coding knowledge.5 Dependency on Developers: Once your custom theme is built, you may need to rely on developers for future updates or modifications, which can be inconvenient or costly if you don’t have in-house expertise. Conclusion Creating your own WordPress theme has lots of benefits for businesses. It helps make your website unique, perfect for your needs, and easy to grow. But, it takes time, money, and some tech skills. Before you decide, think about your budget, how soon you need it done, if you have the right skills, and what you want your website to look and do. By thinking about these things carefully, you can decide if making your own WordPress theme is the right choice for you.

WordPress Themes and Plugins Read More »

Wordpress

Exploring WordPress 6.5.2 What’s New and Improved

WordPress, known as the top content management system globally, keeps advancing with its newest update, version 6.5.2. In this post, we’ll explore the important features and improvements that come with WordPress 6.5.2 and discuss how they can be beneficial for website owners, developers, and users. Improved Performance and Security WordPress 6.5.2 introduces notable enhancements in both performance and security, establishing itself as a powerful platform for managing websites of any scale. The update features refined code and database queries, leading to quicker page loads and enhanced site speed overall. Moreover, strengthened security measures offer protection against potential vulnerabilities, guaranteeing a safer online journey for users. Enhanced Block Editor Experience In WordPress 6.5.2, the block editor, which was first introduced in earlier versions, gets upgrades. Users can enjoy a more seamless and user-friendly editing process, thanks to improved block management tools and enhanced customization choices. Whether you’re crafting blog posts, building pages, or creating custom layouts, the block editor in WordPress 6.5.2 enables you to design and structure content with ease. Accessibility and User Experience In WordPress 6.5.2, making websites accessible to everyone is a top priority. This means that people of all abilities can easily use and enjoy websites created on this platform. With features like better keyboard navigation, compatibility with screen readers, and improved color contrast choices, WordPress 6.5.2 ensures that users with disabilities can navigate and engage with website content more comfortably. Compatibility and Plugin Updates WordPress 6.5.2 remains compatible with a vast array of plugins and themes, ensuring users can easily integrate third-party tools and extensions into their sites. Additionally, plugin developers have been proactive in rolling out updates to ensure smooth compatibility with the latest WordPress version. This enables users to enrich their websites with fresh features and functionalities without any hassle. Bug Fixes and Stability Like all software updates, WordPress 6.5.2 tackles multiple bugs and issues raised by users and developers. The focus is on enhancing overall stability and dependability, reducing downtime and potential interruptions for website owners. By addressing known issues and applying fixes, WordPress 6.5.2 provides a more seamless and trustworthy platform for handling online content. How to Update to WordPress 6.5.2 To update to WordPress 6.5.2, existing users can follow these simple steps. First, log in to your WordPress dashboard. Then, go to the Updates section and click on the “Update Now” button. It’s advisable to create a backup of your website before starting the update process to prevent any possible data loss. WordPress 6.5.2 brings significant improvements in performance, security, accessibility, and user experience, making it a valuable upgrade for both website owners and developers. Keeping up with the latest version of WordPress allows users to take advantage of new features and enhancements, enabling them to build dynamic and compelling websites.

Exploring WordPress 6.5.2 What’s New and Improved Read More »

wordpress

WordPress 6.5.2 Exploit Alert: Understanding Risks, Mitigation Strategies, and Securing Your Website

In recent times, WordPress has issued an exploit alert regarding version 6.5.2, highlighting potential risks that website owners need to be aware of. In this blog post, we’ll delve into the WordPress 6.5.2 exploit alert, discussing the risks involved, strategies to mitigate these risks, and steps to secure your website effectively.   Understanding the Risks: The WordPress 6.5.2 exploit alert signifies that there are vulnerabilities in this particular version of WordPress that malicious actors can exploit. These vulnerabilities can range from issues with plugin or theme compatibility to more critical security flaws that could lead to unauthorized access, data breaches, or even website defacement. Cross-Site Scripting (XSS): Where attackers can insert harmful scripts into pages seen by others. SQL Injection:  Hackers could run harmful SQL queries to access or alter your database. Authentication Bypass:  Issues that permit unauthorized entry to admin sections or critical features. File Upload Vulnerabilities:  Exploits that enable attackers to upload and run harmful files on your server. Mitigation Strategies: To mitigate the risks associated with the WordPress 6.5.2 exploit alert, consider the following strategies: Update to the Latest Version: Start by updating your WordPress to the newest version. Developers regularly release updates to fix vulnerabilities, making it crucial to stay current. Audit Plugins and Themes: Check all installed plugins and themes for compatibility with the latest WordPress version. Remove any old or unused ones and replace them with secure options from trusted sources. Use Security Plugins: Enhance your website’s security with plugins like Wordfence, Sucuri, or iThemes Security. These tools can identify and block malicious activities, monitor file changes, and bolster login security. Enable Two-Factor Authentication (2FA): Add an extra layer of security by requiring users to verify their identity with a second factor, like a one-time code sent to their phone, along with their password. Regular Backups: Keep regular backups of your website to quickly restore it in case of a security breach or data loss. Use reliable backup plugins or services that offer automated backups and secure storage. Securing Your Website: Apart from the strategies mentioned earlier to address specific issues, here are some general tips to boost the security of your WordPress website: Encourage Strong Passwords: Advise users to create strong, unique passwords. Consider enforcing password policies that require a mix of letters, numbers, and special characters to enhance security. Limit Login Attempts: Employ plugins or server settings to restrict the number of login tries allowed within a specific timeframe. This helps deter brute-force attacks aimed at guessing passwords. Regular Security Audits: Perform routine security checks on your website. Scan for malware, review file permissions to ensure only authorized access, and inspect server logs for any suspicious activities that might indicate a security breach. Choose Secure Hosting: Opt for a reliable hosting provider that offers secure hosting environments. Look for SSL/TLS certificates to encrypt data in transit and inquire about proactive security measures like firewalls and intrusion detection systems. By following these tips alongside the specific mitigation strategies mentioned earlier, you can significantly enhance the overall security of your WordPress website. The alert regarding the WordPress 6.5.2 exploit underscores the critical need for website owners to take proactive steps in securing their sites. By grasping the potential risks associated with such exploits, adopting effective mitigation strategies, and adhering to established best practices for website security, you can greatly diminish the chances of being targeted by malicious attacks. This not only protects your online presence but also contributes to a safer environment for your business or personal brand on the internet.

WordPress 6.5.2 Exploit Alert: Understanding Risks, Mitigation Strategies, and Securing Your Website Read More »

SiteSpy

Discover How SiteSpy Can Skyrocket Your Website’s Ranking

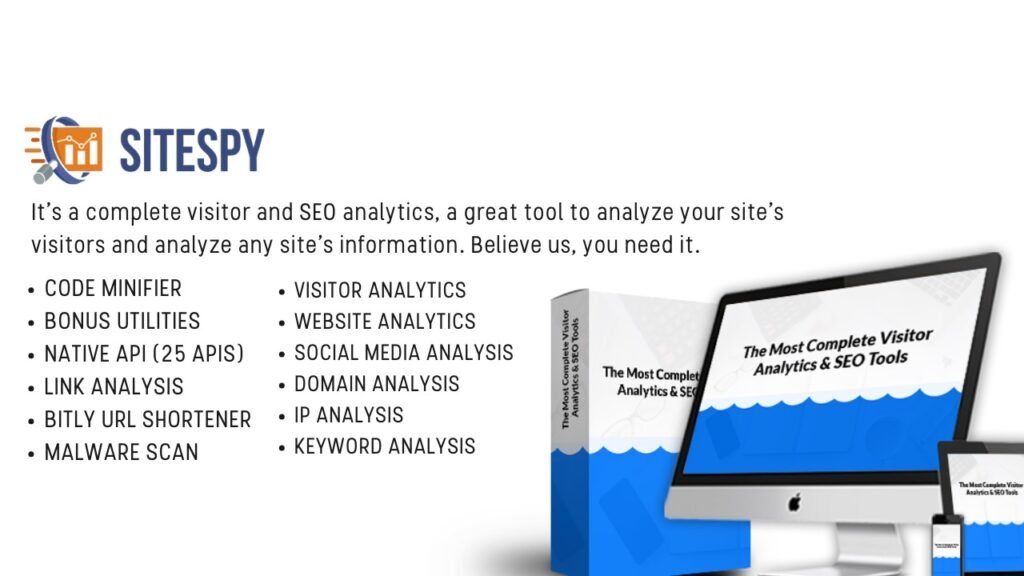
Are you looking to enhance your website’s performance in search engine rankings? Look no further than SiteSpy – the ultimate tool for analyzing and optimizing your SEO strategy. By utilizing SiteSpy, you can gain valuable insights into your website’s performance, identify areas for improvement, and ultimately boost your online visibility. Why SiteSpy is Essential for Your Website SiteSpy is a powerful SEO tool that enables you to monitor your website’s performance in real-time. With features such as keyword tracking, backlink analysis, and competitor research, SiteSpy provides you with the data you need to make informed decisions about your SEO strategy. By using SiteSpy, you can stay ahead of the competition and ensure that your website ranks higher in search engine results. How SiteSpy Works its Magic SiteSpy works by collecting and analyzing data from various sources, including search engines, social media platforms, and other websites. By aggregating this data, SiteSpy can provide you with valuable insights into your website’s performance, including keyword rankings, backlink profiles, and more. With SiteSpy, you can track your progress over time and make adjustments to your SEO strategy as needed. Key Features of SiteSpy SEO Insights: Discover valuable SEO knowledge, ranging from keyword research to optimizing on-page elements, to improve your search engine rankings. Competitor Analysis: Gain insights into your competitors’ strategies, including the keywords they target and their backlink profiles, allowing you to adjust your approach accordingly. Performance Monitoring: Keep a watchful eye on website performance metrics to ensure a smooth user experience and increased conversions. Social Media Tracking: Monitor social media engagement and content performance to fine-tune your social media strategy and expand your audience reach. Content Evaluation: Assess the quality and impact of your content, identifying areas for enhancement and content that resonates with your audience. Conversion Analysis: Delve into conversion data to gain insights into user behavior, optimize conversion pathways, and enhance your overall profitability. Top Benefits You’ll Reap from SiteSpy Improved Search Engine Rankings: By utilizing SiteSpy, you can optimize your website for search engines and improve your rankings. Sharper Strategy: Develop more effective strategies supported by a deep understanding of your performance and the market environment. Enhanced Online Visibility: Increase your website’s visibility online and attract more visitors. Greater Competitive Advantage: Differentiate yourself from competitors by using data-driven strategies and remaining adaptable. Satisfied Visitors: Provide an excellent user experience, keeping visitors engaged and increasing conversion rates. Data-Driven Decision Making: Make informed decisions about your SEO strategy based on real-time data from SiteSpy. Masterful Marketing: Refine your SEO, social media, and content strategies to foster organic growth and optimize return on investment (ROI). A Step-by-Step Guide to Downloading and installing SiteSpy Seo Tools from Queue Index Step 1:Visit Queue Index Access the Queue Index Website: Begin by opening your preferred web browser and navigating to the official Queue Index website. Go to the dedicated page for SiteSpy to explore its exclusive features and detailed information: SiteSpy Product Page. Explore SiteSpy Product Page: Dive into the SiteSpy product page on Queue Index to gain insights into its versatile features, benefits, and pricing. Ensure a stable internet connection for a seamless exploration. Step 2: Select and Purchase Your License Choose Your Plan: On the SiteSpy product page, choose the plan that aligns with your specific requirements. Queue Index provides various options, allowing you to customize your purchase according to your needs. Add to Cart and Proceed to Checkout: Add your chosen plan to the cart and proceed to checkout. Follow the prompts to provide necessary information and securely complete the transaction. Confirmation Email: Upon successful purchase, a confirmation email will be sent to you, containing your license details and a link to access . Step 3: Access and Download SiteSpy Open Download Link: Open the confirmation email and click on the provided download link. Alternatively, you can visit the ‘Downloads’ section on the Queue Index website and locate the SiteSpy download link associated with your purchase. Initiate Download: Click on the download link to begin the SiteSpy download process. The duration may vary depending on your internet speed. Step 4: Install SiteSpy Locate Downloaded File: Once the download is complete, find the downloaded SiteSpy installation file on your computer, typically saved in your designated download folder. Run the Installation Wizard: Double-click on the installation file to launch the SiteSpy installation wizard. Follow the on-screen instructions to proceed with the installation. Enter License Details: During the installation, input the license details provided in the confirmation email accurately. This step is crucial to activate your SiteSpy installation. Complete Installation: Allow the installation wizard to finish the process. Once completed, SitSpy is now ready to be launched on your system. Step 5: Launch SiteSpy and Elevate Your Workflow Open SiteSpy: Locate the SiteSpy icon on your desktop or in your applications folder. Double-click to open the application. Explore the Possibilities: Congratulations! You’re now equipped to explore the robust features of SiteSpy.  Why Queue Index? Exclusive Access: Queue Index provides a special platform for buying SiteSpy. This ensures that you can quickly access the newest and most advanced Tools technology designed specifically for SiteSpy’s SEO tools.. Secure Transactions: Rest easy knowing that your transactions on Queue Index are secure. Your privacy and financial information are treated with the utmost care, providing you with a safe and reliable purchasing experience. Prompt Customer Support: Have questions or need assistance? Queue Index takes pride in its prompt and helpful customer support. Your satisfaction is their priority, ensuring a smooth and enjoyable purchasing process. Enhance Your SEO Strategy with SiteSpy SiteSpy is a powerful tool that offers a wide range of benefits, from competitive analysis to performance monitoring and SEO optimization. By leveraging SiteSpy’s features and insights, you can elevate your website’s performance, outperform competitors, and achieve digital marketing success. Unlock the full potential of your online presence with SiteSpy and take your digital strategy to new heights.

Discover How SiteSpy Can Skyrocket Your Website’s Ranking Read More »

RackNerd

RackNerd’s Black Friday 2024: Grab VPS Deals Starting From Just $10/Year – No Promo Code Needed!

Ready to Take Your Online Presence to the Next Level? RackNerd’s Black Friday Sale Is Here with Exclusive Deals on VPS, Ryzen VPS, Reseller Hosting, Dedicated Servers, and Shared Hosting That You Won’t Find Anywhere Else! Explore Exciting VPS Hosting Deals: Experience the Advantages of Virtualization Upgrade to RackNerd’s VPS Hosting for top-notch performance and dependability. Take advantage of Black Friday deals now for the ideal opportunity to enhance your hosting setup. Benefit from blazing-fast speeds, complete root access, and round-the-clock expert assistance. Accelerate your digital journey with a turbo boost! 4.5GB KVM VPS for only $52.49/Year 4 vCPU Cores 115 GB Pure SSD Storage 4.5 GB RAM 10,000 GB Monthly Transfer 1 Gbps Network Port Click It Here 4GB KVM VPS for only $38.88/Year 2 vCPU Cores 80 GB Pure SSD Storage 4 GB RAM 8000 GB Monthly Transfer 1 Gbps Network Port Click It Here 2.5GB KVM VPS for only $25.49/Year 2 vCPU Cores 50 GB Pure SSD Storage 2.5 GB RAM 5000 GB Monthly Transfer 1 Gbps Network Port Click It here 2GB KVM VPS for only $16.98/Year 1 vCPU Core 30 GB Pure SSD Storage 2 GB RAM 2500 GB Monthly Transfer 1 Gbps Network Port Click It Here 768MB KVM VPS for only $10.18/Year 1 vCPU Core 15 GB Pure SSD Storage 768 MB RAM 1000 GB Monthly Transfer 1 Gbps Network Port Click It Here Ryzen VPS Discounts: Unleash High-Performance Processing Power Step into the next generation of hosting with RackNerd’s Ryzen VPS. Fueled by the AMD Ryzen 7950X CPU, these virtual servers offer unmatched performance for intensive applications. Black Friday brings incredible discounts on Ryzen VPS packages – don’t miss out on the chance to upgrade your hosting experience! 1.5GB Ryzen NVMe VPS for only $19/Year 1 vCPU AMD Ryzen Core 30 GB NVMe Storage 1.5 GB RAM DDR5 2500 GB Monthly Transfer 1 Gbps Network Port Click It Here 2GB Ryzen NVMe VPS for only $29/Year 2 vCPU AMD Ryzen Cores 40 GB NVMe Storage 2 GB RAM 4000 GB Monthly Transfer 1 Gbps Network Port Click It Here 3GB Ryzen NVMe VPS for only $45/Year 2 vCPU AMD Ryzen Cores 55 GB NVMe Storage 3 GB RAM 6000 GB Monthly Transfer 1 Gbps Network Port Click It Here Exclusive Dedicated Server Offers : Uncompromised Performance For those looking top-notch performance, RackNerd’s Dedicated Servers are a game-changer. Don’t miss out on exclusive offers this Black Friday for high-performance dedicated hosting. Get full server control, customizable setups, premium hardware, and the reliability your business requires. Intel Xeon E3-1240 V2 for only $59/Month Intel Xeon E3-1240 V2 – 4x 3.40 GHz (8 Threads, 3.80 GHz Turbo) 32 GB DDR3 RAM 2x 2 TB SATA HDD 30 TB @ 1Gbps Bandwidth /28 – 13 Usable IPs IPMI Access New York – East Coast Datacenter Click It Here Dual Xeon E5-2690 V4 for only $149/Month Dual Xeon E5-2690 V4 – 28x 2.60 GHz (56 Threads, 3.50 GHz Turbo) 64 GB DDR4 RAM 1.2 TB NVMe 100 TB @ 1Gbps Bandwidth /29 – 5 Usable IPs IPMI Access Utah – West Coast Datacenter Click It Here Dual Xeon E5-2630 V4 for only $159/Month Dual Xeon E5-2630 V4 – 20x 2.20 GHz (40x Threads, 3.10GHz Turbo) 64 GB DDR4 RAM 12x 8 TB SATA HDD (HW RAID) 1Gbps Unmetered Bandwidth /29 – 5 Usable IPs IPMI Access Utah – West Coast Datacenter Click It Here SEO Server Special for only $140/Month Intel Xeon E3-1240 V2 – 4x 3.40 GHz (8 Threads, 3.80 GHz Turbo) 16 GB DDR3 RAM 1 TB SSD 30 TB @ 1Gbps Bandwidth /29 + 4x /26 or 8x /27 or 16x /28 IPMI Access Multiple Datacenter Locations Click It Here Budget-Friendly and Reliable Shared Hosting Options Launching a blog or small business site? RackNerd’s Shared Hosting plans are tailored just for you. Take advantage of special discounts this Black Friday for dependable hosting at an unmatched value. Benefit from features such as easy one-click setups, 99.9% uptime, and responsive customer service. SHARED – 40 GB for only $12.39/Year 40 GB SSD Disk Space 3 TB Monthly Transfer Unlimited Databases Host 3 Domains Free SSL Certificates CloudLinux Powered KernelCare Enabled (maximum security/uptime) cPanel Control Panel Softaculous Script Installer LiteSpeed Web Server Click It Here SHARED – 80 GB for only $21.49/Year 80 GB SSD Disk Space 6 TB Monthly Transfer Unlimited Databases Host 10 Domains Free SSL Certificates CloudLinux Powered KernelCare Enabled (maximum security/uptime) cPanel Control Panel Softaculous Script Installer LiteSpeed Web Server Click It Here SHARED – 140 GB for only $49.95/Year 140 GB SSD Disk Space 20 TB Monthly Transfer Unlimited Databases Host Unlimited Domains Free SSL Certificates CloudLinux Powered KernelCare Enabled (maximum security/uptime) cPanel Control Panel Softaculous Script Installer LiteSpeed Web Server Click It Here Reseller Hosting Offers: Start Your Own Hosting Business Entrepreneurs, here’s an opportunity for you! RackNerd’s Reseller Hosting plans make it easy to start your own hosting business. Take advantage of special deals to kick off your entrepreneurial journey without spending too much. Enjoy white-label solutions, strong infrastructure, and unmatched reliability. RESELLER – 80 GB for only $29.88/Year 80 GB SSD Disk Space 3 TB Monthly Transfer 5 cPanel Accounts Free SSL Certificates CloudLinux Powered KernelCare Enabled (maximum security/uptime) cPanel & WHM Control Panel Softaculous Script Installer LiteSpeed Web Server Click It Here RESELLER – 120 GB for only $55/Year 120 GB SSD Disk Space 5 TB Monthly Transfer 10 cPanel Accounts Free SSL Certificates CloudLinux Powered KernelCare Enabled (maximum security/uptime) cPanel & WHM Control Panel Softaculous Script Installer LiteSpeed Web Server Click It Here RESELLER – 200 GB for only $79.99/Year 200 GB SSD Disk Space 10 TB Monthly Transfer 15 cPanel Accounts Free SSL Certificates CloudLinux Powered KernelCare Enabled (maximum security/uptime) cPanel & WHM Control Panel Softaculous Script Installer LiteSpeed Web Server Click It Here What does RackNerd offer? RackNerd servers are suitable for many tasks, including website building and hosting. Here are some examples of how people use RackNerd servers: Website Hosting Web Application Deployment Development and Testing Game Servers Data Backup and Storage Media Streaming Virtual Private Networks (VPNs) Email Hosting Reselling Hosting Services Don’t wait to take advantage of these fantastic Black Friday deals! Upgrade your online experience

RackNerd’s Black Friday 2024: Grab VPS Deals Starting From Just $10/Year – No Promo Code Needed! Read More »

Innovate Your Design: A Simple Journey into Wireframing with QueueIndex

Wireframing is like creating a rough sketch or plan for how a website or app will look and work. It’s not about colors or fancy details but focuses on where things will be placed, how they’ll function and how users will interact with it . Designers use wireframes to figure out the basic structure and flow of a digital product before adding all the pretty details. This helps get early feedback, make improvements, and set a solid foundation for the final design and development. Benefits of Wireframing Wireframing in website development has three main benefits:- First, it saves time by giving a quick outline of the website’s layout without diving into detailed design. Second, it helps teams work together better by providing a common visual language everyone can understand. Third, it reduces the need for lots of changes later on by catching potential problems early. Overall, wireframing makes building websites easier, faster, and more efficient. Queue Index Wireframing Services: QueueIndex.com is a fantastic platform for making website blueprints. It’s easy to use, even if you’re new to it. We have lots of templates for different types of projects, saving your time. You can work together with your team by sharing your blueprints and getting feedback. Plus, we show you how your designs will look on different devices. Overall, QueueIndex.com is a great place to plan and create websites without any hassle. Step-by-Step Guide How Book a Wireframing Services with us: Step 1: Visit QueueIndex : Open your web browser and go to QueueIndex.com. Step 2: Navigating the QueueIndex.com Dashboard : Step 3: Click on Our Service and Select Wireframing Step 4: Select Service For Booking Step 5: Click on a time slot to proceed with booking. Step 6: Please provide your details in the form below to proceed with booking.

Innovate Your Design: A Simple Journey into Wireframing with QueueIndex Read More »

Optimize Your Business with Perfex v3.1.1 – A Powerful Open Source CRM缩略图

Optimize Your Business with Perfex v3.1.1 – A Powerful Open Source CRM

In today’s dynamic business landscape, the need for effective tools to streamline operations and enhance customer relationships is more crucial than ever. Perfex v3.1.1, an open-source Customer Relationship Management (CRM) solution, stands out as a powerfulally in helping businesses achieve these goals. This blog post will guide you through the process of downloading and installing Perfex v3.1.1, empowering you to take control of your business operations. Understanding the Essence of Perfex v3.1.1: Perfex CRM is a feature-rich, open-source CRM that offers a comprehensive suite of tools to manage and optimize customer relationships. From contact management to project collaboration, Perfex provides a seamless experience, making it an invaluable asset for businesses of all sizes. Downloading Perfex v3.1.1: To embark on your Perfex journey, start by downloading the latest version directly from the official website here. Simply follow the link, and on the product page, you’ll find the option to download the most up-to-date release. Installation Journey: A Step-by-Step Guide: Step 1: Extract the Files Upon completing the download, extract the contents of the zip folder to your preferred location on your server. This will prepare the groundwork for the installation process. Step 2: Create a Database Take the initiative to create a new database on your server where Perfex will securely store and manage your business data. Step 3: Configuration Navigate to the config.php file within the extracted folder and input the necessary database details, including the database name, username, and password. This step establishes the connection between Perfex and your designated database. Step 4: Run the Installer Open your preferred web browser and access the directory where you’ve stored the Perfex files. The installer will seamlessly guide you through the setup process, automatically creating the essential tables within your specified database. Step 5: Login and Customize With the installation complete, log in to Perfex using the default credentials. From here, the CRM opens up a world of possibilities. Customize settings, add users, and tailor Perfex to align with your unique business requirements. Your Journey with Perfex Begins: Congratulations! By following these steps, you’ve successfully installed Perfex v3.1.1 on your system. Your business is now equipped with a robust CRM tool that promises to revolutionize the way you manage customer relationships, streamline communication, and enhance overall operational efficiency. Get Started Today: Unlock the Potential of Perfex v3.1.1: Ready to elevate your business operations? Waste no time and acquire Perfex v3.1.1 by visiting the official website: Perfex CRM.

Optimize Your Business with Perfex v3.1.1 – A Powerful Open Source CRM Read More »

Leo v3.0: Bringing Dreams to Life in the World of AI Artistry缩略图

Leo v3.0: Bringing Dreams to Life in the World of AI Artistry

Step into a realm where pixels transform into poetry and imagination knows no bounds – welcome to the mesmerizing world of Leo v3.0. This latest iteration of the Leo series is not just an AI image generator; it’s a digital sorcerer, conjuring awe-inspiring visuals that dance on the edge of reality and fantasy. In this blog post, let’s embark on a captivating journey through the enchanting features of Leo v3.0 and explore the breathtaking wonders it unveils in its AI gallery. Unleashing the Power of Leo v3.0: Captivating Features: Leo v3.0 is not your ordinary image generator; it’s a symphony of algorithms harmonizing to create visual symphonies. With a quantum leap in sophistication, this AI model harnesses the magic of generative adversarial networks (GANs) to birth high-resolution, lifelike images that defy the imagination. Visual Symphony in High-Res: Picture this – Leo v3.0 isn’t just painting; it’s crafting masterpieces in high-definition. Say goodbye to pixelated limitations; Leo v3.0 introduces an era where every stroke and hue manifests in glorious detail, ready to be admired on both digital screens and canvas alike. Style Fusion and Personalization: Leo v3.0 isn’t content with ordinary mimicry; it’s a shape-shifter, seamlessly transferring styles from one image to another. Artists can now dive into a kaleidoscope of creative possibilities, infusing their distinct personalities into every stroke. Your imagination is the only limit. Whispers of Versatility: Whether it’s the serenity of a tranquil landscape, the soul-stirring allure of a portrait, or the abstract dance of colors, Leo v3.0 is a versatile virtuoso. It molds itself to any artistic realm, embracing a kaleidoscope of genres to cater to the eclectic tastes of creators. User-Friendly Enchantment: Fear not the complexities of magic; Leo v3.0 invites creators into its realm with an enchantingly user-friendly interface. Real-time previews, intuitive controls – it’s an artist’s playground where every wish is granted with the swipe of a digital wand. Leo v3.0 Gallery: Where Dreams Come Alive: Step into the Leo v3.0 gallery, a treasure trove of dreams realized and fantasies brought to life. Here, every click reveals a portal to a parallel dimension of creativity. Highlights from the gallery include: Majestic Masterpieces: Behold the awe-inspiring creations that defy the boundaries between reality and imagination. Leo v3.0’s handiwork unfolds in intricate masterpieces that leave onlookers spellbound. Stylistic Wonderland: Take a journey through a wonderland of styles – from the echoes of classical elegance to the avant-garde whispers of modern art. Leo v3.0’s style exploration transcends the ordinary, pushing the boundaries of artistic expression. Collaborative Constellations: Witness the celestial collaborations of the Leo community, where multiple creators join forces to birth digital constellations. The gallery pulsates with the collective heartbeat of a global community passionate about pushing the boundaries of art and imagination. Why Queue Index? Exclusive Access: Queue Index offers an exclusive platform to purchase Leo v3.0, ensuring that you get firsthand access to the latest and most advanced AI image generation technology. Secure Transactions: Rest easy knowing that your transactions on Queue Index are secure. Your privacy and financial information are treated with the utmost care, providing you with a safe and reliable purchasing experience. Prompt Customer Support: Have questions or need assistance? Queue Index takes pride in its prompt and helpful customer support. Your satisfaction is their priority, ensuring a smooth and enjoyable purchasing process. A Step-by-Step Guide to Downloading and Installing Leo v3.0 from Queue Index Step 1: Navigate to Queue Index Visit the Queue Index Website:Start by accessing the Queue Index website on your preferred web browser. Navigate to the dedicated page for Leo v3.0 to explore exclusive features and information about the product. Explore Leo v3.0 Product Page:Browse through the Leo v3.0 product page on Queue Index to understand its features, benefits, and pricing. Ensure that you have a stable internet connection for a smooth downloading process. Step 2: Select and Purchase Your License Choose Your License:On the product page, select the license that best suits your needs. Queue Index offers various options, allowing you to tailor your purchase to your artistic requirements. Add to Cart and Checkout:Add the selected license to your cart and proceed to checkout. Follow the prompts to provide necessary information and complete the transaction securely. Receive Confirmation:Upon successful purchase, you’ll receive a confirmation email containing your license key and a link to download Leo v3.0. Step 3: Download Leo v3.0 Access the Download Link:Open the confirmation email and click on the provided download link. Alternatively, visit the ‘Downloads’ section on the Queue Index website and locate the Leo v3.0 download link associated with your purchase. Initiate Download:Click on the download link to initiate the Leo v3.0 download process. Depending on your internet speed, the download may take a few moments. Step 4: Install Leo v3.0 Locate Downloaded File:Once the download is complete, locate the downloaded Leo v3.0 installation file on your computer. It is typically saved in your designated download folder. Run the Installation Wizard:Double-click on the installation file to run the Leo v3.0 installation wizard. Follow the on-screen instructions to proceed with the installation. Enter License Key:During the installation process, you will be prompted to enter the license key provided in the confirmation email. Copy and paste the key accurately to activate your Leo v3.0 installation. Complete Installation:Allow the installation wizard to complete the process. Once finished, Leo v3.0 is ready to be launched on your computer. Step 5: Launch Leo v3.0 and Unleash Your Creativity Open Leo v3.0:Locate the Leo v3.0 icon on your desktop or in your applications folder. Double-click to open the application. Explore and Create:Congratulations! You are now ready to explore the features of Leo v3.0 and dive into a world of limitless artistic possibilities. Begin creating stunning AI-generated images and bring your creative visions to life Conclusion: Transform Your Artistic Vision with Leo v3.0 on Queue Index With Leo v3.0 now at your fingertips, the only limit is your imagination. Download, install, and let your creativity soar with this groundbreaking AI image generation tool from Queue Index. Leo v3.0

Leo v3.0: Bringing Dreams to Life in the World of AI Artistry Read More »

Currency