It is a very popular choice and is often used by hosting providers that offer shared hosting solutions.
However, you can find control panels that are more user-friendly and easier to use on your Ubuntu 22.04 LTS server. CyberPanel is one such management panel that you should consider exploring.
CyberPanel is an open-source web hosting control panel. It manages several services like websites, email, DNS, and databases. This panel comes with a range of features, including one-click SSL certificate installation, automatic backups, one-click installation for WordPress/Joomla/Magento, etc.
Install CyberPanel on Ubuntu 22.04 LTS Server
Step # 1: Update System Packages
The first step is to log in to your server using an SSH client such as PuTTY and update the system packages:
sudo apt-get update && sudo apt-get upgrade
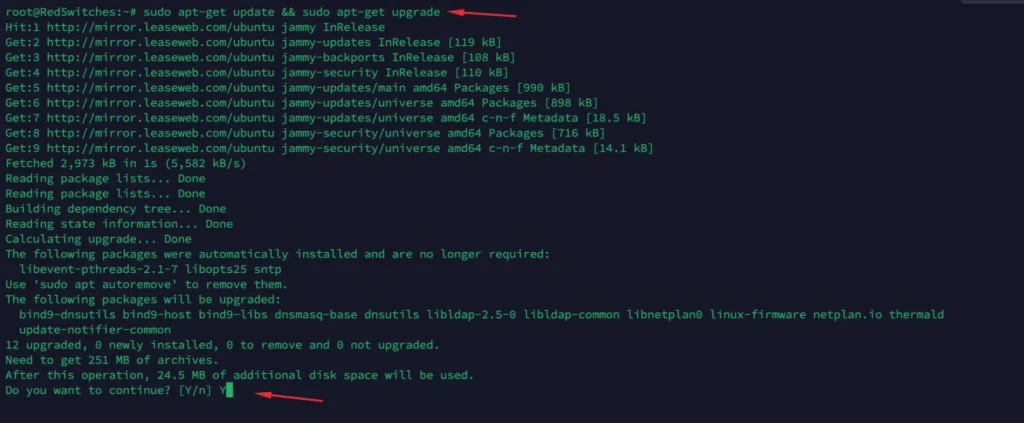
Once prompted, press Y to proceed further with the upgrade.
Step # 2: Install the Dependencies
Use the following command to install the CyberPanel dependencies:
sudo apt-get install python3 python3-dev python3-pip wget unzip rsync net-tools curl libssl-dev
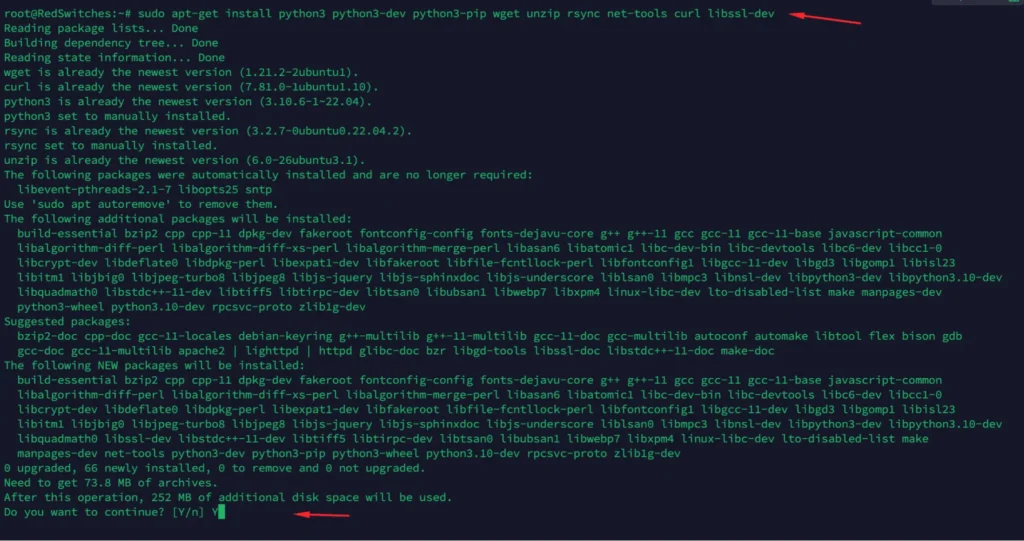
Once prompted, press Y to proceed further with the upgrade.
Step # 3: Download and Install CyberPanel
The following script will connect to the official website and download the latest version.
sh <(curl https://cyberpanel.net/install.sh || wget -O - https://cyberpanel.net/install.sh)
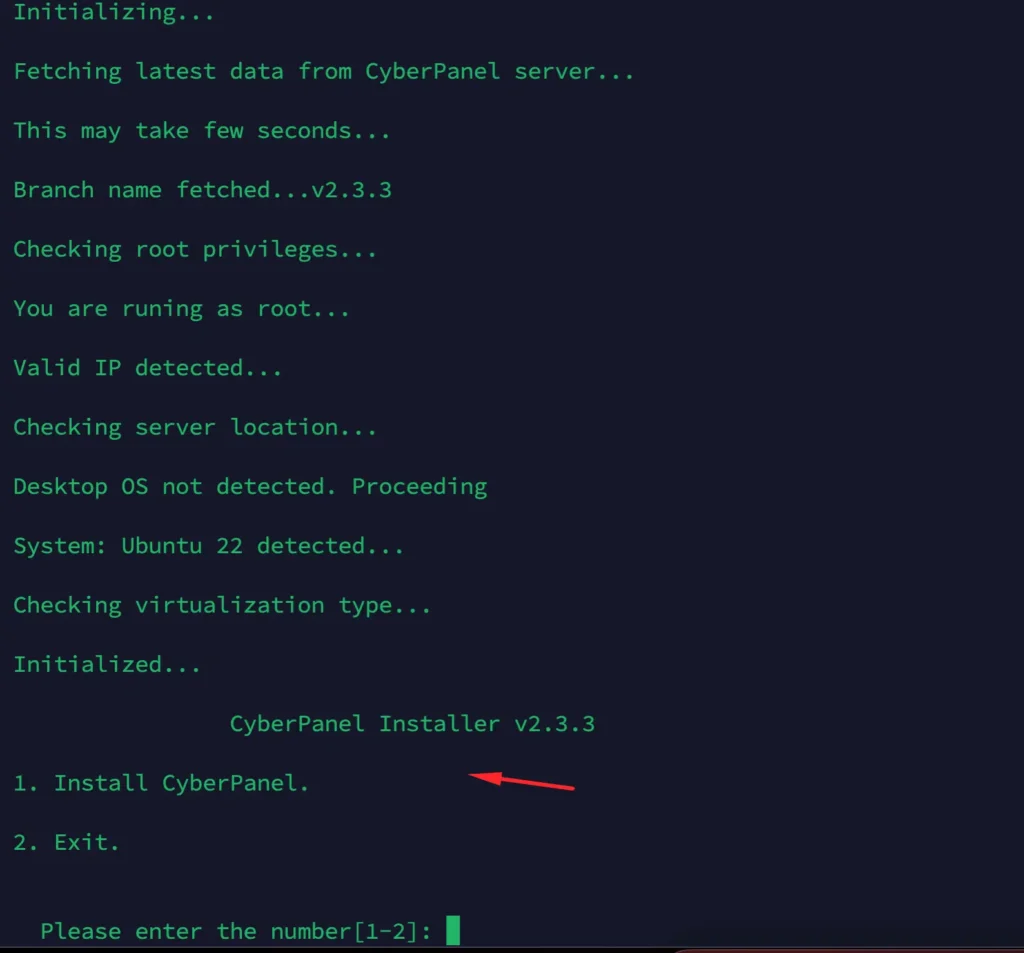
Since you’re logged in as a root user, the script checks the system compatibility and hardware resource requirements after downloading the files.
Step # 4: Carry Out Initial Configuration
Next, the installer will ask you to choose appropriate options to proceed with the installation.
You can select option “1” to install the CyberPanel control panel on your server. If you want to exit the installer, select option “2”.
Step # 5: Select the Appropriate CyberPanel Version
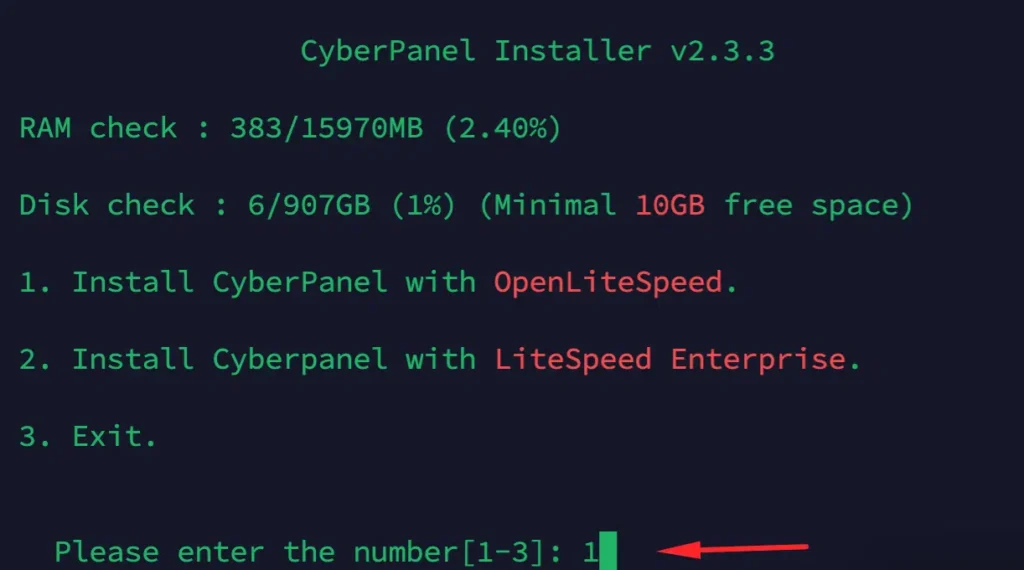
In the next step, the text-based installer will ask you to select a version for your CyberPanel installation. You can select “OpenLiteSpeed” or “LiteSpeed Enterprise” as per your choice.
Step # 6: Install Full Service
In this step, select the Full service for CyberPanel for your Ubuntu 22 server, including PowerDNS, Postfix, and Pure-FTPd.
Press Y to continue.

Step # 7: Choose Local or Remote MySQL Setup
Now you‘ll see an interesting choice related to MySQL database server.
CyberPanel works equally well with local and remote MySQL servers, and you can choose the scenario that works with your server infrastructure.
So, if you’re currently using a separate MySQL server, you can select the option “Y” so that the installer will not install MySQL service on your server.
If you want to install MySQL server on the same server, you can select the option “N” and proceed further. The default installation option is “No,” so you can proceed further if you don’t want to install a local MySQL server.

Step # 8: Select CyberPanel Version
The installer offers you a chance to select a specific version or just install the latest version.

Step # 9: Set a Password for CyberPanel
The default password for Cyberpanel installation is 1234567. As you can see, this is pretty weak. CyberPanel allows you to set a stronger password for your installation.
For this, enter “s” and enter a strong password twice.

Step # 10: Install the CyberPanel Memcached PHP Extension
Memcached is among the most popular PHP extensions. It is a high-performance, distributed memory caching system that speeds up web applications by reducing the load on the database.
It can be used for object, database, and page caching. QueueIndex recommend you install this extension during CyberPanel installation.

Step # 11: Install CyberPanel Redis PHP Extension
Redis is another powerful tool for optimizing website performance.
The CyberPanel Redis extension allows developers to store and retrieve data from Redis, an in-memory data structure store. The extension offers many key benefits, including improved scalability, lower latency, and better resource utilization. QueueIndex recommend you install this extension on the server during the CyberPanel installation.

Step # 12: Finalize the Installation
Finalize the installation by going through the rest of the steps and finalize the process.
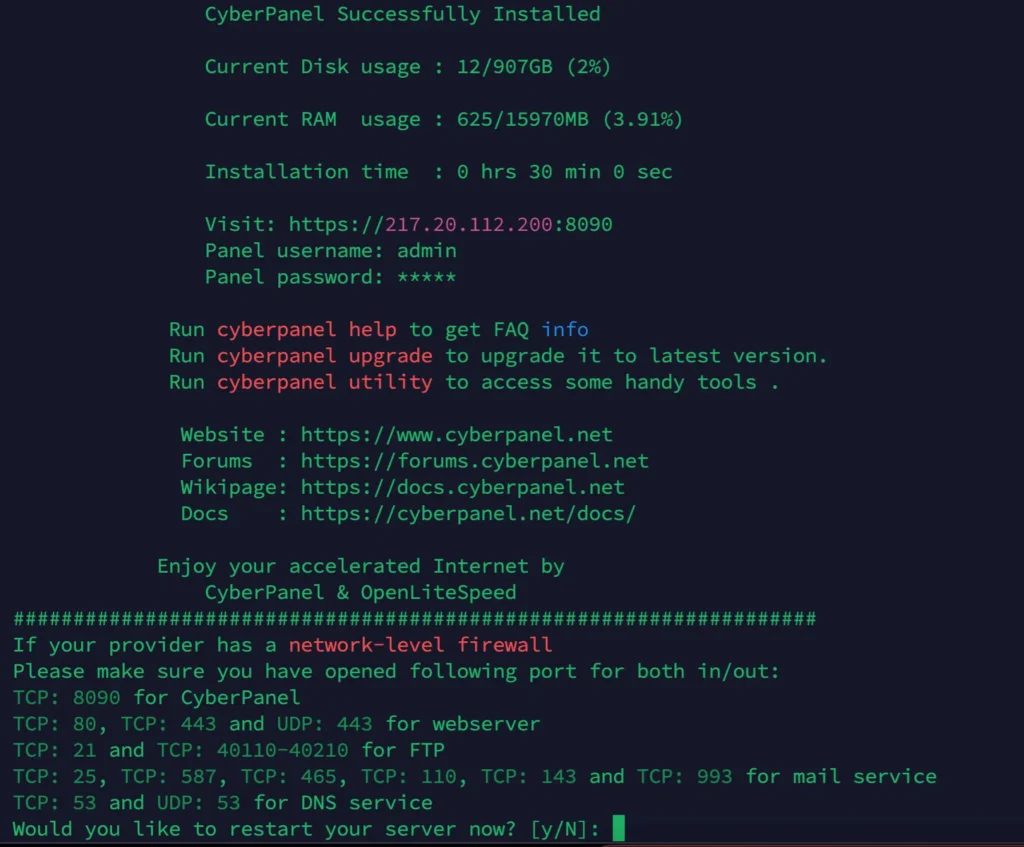
After this, access CyberPanel from your web browser. To do this, open a new tab and enter the IP address of your server, followed by port number 8090.
Allow CyberPanel Ports Through the Firewall
After the installation. The next step is to allow CyberPanel ports through the firewall.
It is important to ensure that the proper ports are whitelisted on the server’s firewall. By default, CyberPanel operates on port 8090 (HTTP) and 8091 (HTTPS). It is highly recommended that these ports are opened (whitelisted) to ensure users can access the control panel securely.
Use the following command to open these ports in the firewall.
sudo ufw allow 8090/tcp && sudo ufw allow 8091/tcp
sudo ufw allow 80,443,25,587,465,110,143,993,53,21/tcp
sudo ufw allow 443,53/udp
sudo ufw allow 40110:40210/tcp
Once these ports are opened, users should be able to access the CyberPanel control panel from any web browser.
Install CyberPanel on Rocky Linux 8 or Almalinux 8
Step # 1: Update System Packages
The first step is to log in to your server using an SSH client such as PuTTY and update the system packages:
sudo dnf update && sudo dnf upgrade - y
Step # 2: Install curl and wget
sudo dnf install wget curl -y
Step # 3: Switch to root user
To install the CyberPanel on your AlmaLinux or Rocky you must have root access, the sudo user will not work. Hence switch to root:
sudo su -
Step # 4: Run CyberPanel installation script on Almalinux or Rocky 8
The process of CyberPanel is very simple, everything is set to install automatically, however, a few inputs are needed by the user, will see them later in this tutorial. Let’s first download and initiate the CyberPanel installation script.
sh <(curl https://cyberpanel.net/install.sh || wget -O - https://cyberpanel.net/install.sh)
Once the script is downloaded and run as a root user, it will first start checking the system compatibility and whether it meets the required hardware resource requirements or not.
Step # 5: CyberPanel Installation
The installation of cyberpanel script is the same as mentioned above in Ubuntu process of installation. Kindly follow the same.
Access CyberPanel
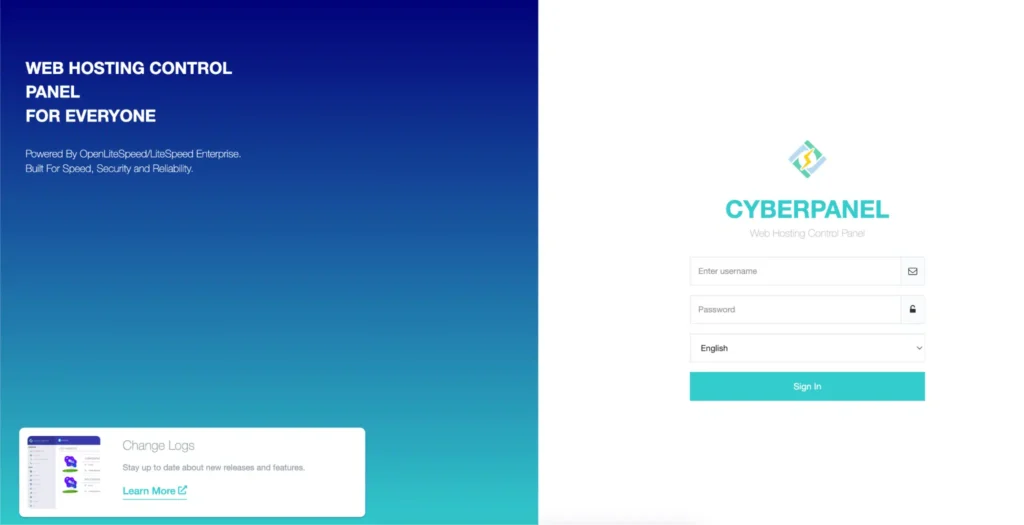
Once you’ve accessed the CyberPanel login page, you can use the default credentials to log in.
First, enter “admin” as your username, and then type the password that you entered during the installation process.
